Installation Instructions: Loudspeakers and Radio


What use is the most beautiful car in the world without music? Some may say, "not necessary" however I disagree. But unfortunately I bought my Cappo with no radio and no loudspeakers. So, quickly to work.

I did not want to ruin the originality of the Cappo with ugly boxes or holes, and thus had to use the original radio aperture.

I encountered the following problems:

  1. The loudspeaker mountings in the footwells are barely accessible.
  2. The loudspeaker holes are very shallow.
  3. The metal brackets for the loudspeakers would not hold speakers of the required size.
  4. Next, I could not find the radio connector in the Cappo.
  5. I could not find the antenna plug.
  6. The radio bezel is removable, however it would only accommodate a non-standard (smaller) radio.


Solutions:

  1. Go head-down into the foot wells - after all it's all exercise! After the fifth time I got it down to a fine art. (Perhaps you should initially have someone to help, in case you can't extricate yourself from your Cappo alone!)

  2. Small depth (45 mm) and the nevertheless tidy diameter (145 mm hole to hole 155 mm) made it not quite easy to find suitable loudspeakers. After much searching, I used a two-way system by F.D. Acustics, Italy: Preis 299 DM. Model: 610 NEO KIT including 2 loudspeakers and 2 tweeters. Not cheap:-|

  3. As everyone knows, loudspeakers need an infinite baffle so that deep bass notes are not lost, i.e. an "acoustic short-circuit" is not present. Before the installation of the bass speaker, I filled the recess with acoustic damping "wool". This arrangement killed the bass a little, but was a reasonable compromise.

  4. After neither I nor my SUZUKI dealer had found the radio plug in the Cappo, the dealer made the suggestion, "with no original radio, there would also be no cables". Mhmm. I did not believe that, since that would mean the factory needing two different wiring harnesses. So more searching ... and there it was. I unclipped and removeed the glove box and there it was in the top right corner. At least thus the loudspeaker cables were already present in the wiring harness, thus no new cables had to be fitted.

  5. Even to this day I haven't found the antenna plug (however I do have an antenna)

  6. Oh dear, this is the most difficult bit. You can insert the radio BEHIND the bezel. However to do this you must first remove the complete centre console. And that means loads of work, loads of sweat and loads of time. But it had to be done. Hiding the radio behind the bezel is also a good anti-theft precaution.

And now we're cruising ..........

THE RADIO:
First remove the center console to gain access for fitting the radio: Begin with the center console's lateral screws BEHIND the seats, open the centre stowage, remove the rubber mat, remove screws (note type of screw), remove the gear stick top, undo the handbrake gaitor's popper, and loosen remaining screws. Because of the wiring you cannot remove the center console completely. Just lift and carefully put to one side. For fitting the radio this is good enough.

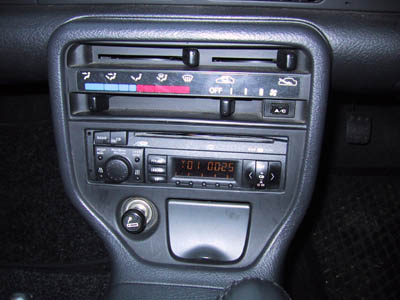
Make all electrical connections to the radio, fit the radio and refit the center console. (I had to wire in an extra earth cable - to one of the attachments at the rear of the center console).

Tests: First ignition on switch, then switch on the radio. Working? Super, otherwise find the error!
Finally reassemble everything in the reverse order.

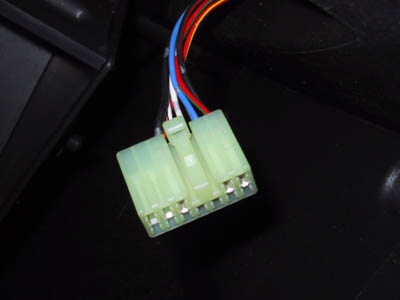
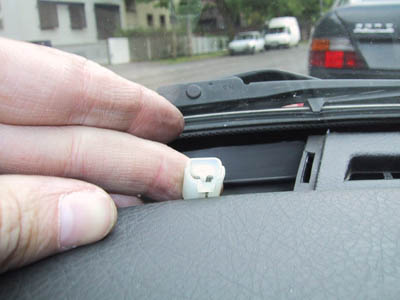
Above: The built-in radio plug


THE TWEETER:

Above: The built-in tweeter plug
Below: The tweeter
The (Piezo) tweeters are mounted in small spaces at the front of the dashboard (with covers that look like ventilation grilles). These mouldings can be levered up with a screwdriver, but carefully! Finding the built-in cable for the tweeter again needs a bit of patience. Then connect the tweeters and insert (possibly fix with a setting foam) and replace the little grilles. Finished


THE LOUDSPEAKER:
First remove the grille. The loudspeaker grilles in the floor space are fastened with small plastic pins. The removal trick; take a pointed screwdriver and depress the center approx. 1 mm (no more, otherwise the pin falls irrecoverably into the vehicle body) then remove the entire pin.
  • Remove the acoustic dampening material (most if not all). If the bass proves too weak, then replace some of this material.
  • Find the loudspeaker cables, crimp on the appropriate connectors, and connect to the loudspeakers.
  • Fasten the loudspeakers in position with metal brackets.
  • Test, finished.

THE SOUND CHECK:


Have fun tinkering - yours Ronald - 19 July 2001

Back